Making A Mechanical Slider Card

There are some days when I'll stare at a blank piece of card stock for hours and never see a finished card. Then on other days, like one this week, when I see something I've never seen before. That's how this beautiful slider card came to be.
For this special card, you will need: card stock, decorator paper, eyelets, fibers, beads and adhesive.

Step 1: Cut and fold the card stock. I have a certain size of envelope that I like to use, so my cards are all cut to fit that. It's easier for me to make the card fit the envelope than find an envelope to fit my card.

Step 2: A simple patterned paper as a background.

Step 3: Cut another decorator paper slightly smaller than the card.

Step 4: Choose an image that fits nicely and cut out a frame slightly taller and much wider. This is the space the image will move back and forth in.

Step 5: Set eyelets in the sides of the image.

Step 6: Set eyelets in the frame in the middle of each side, even with the eyelets on the image.
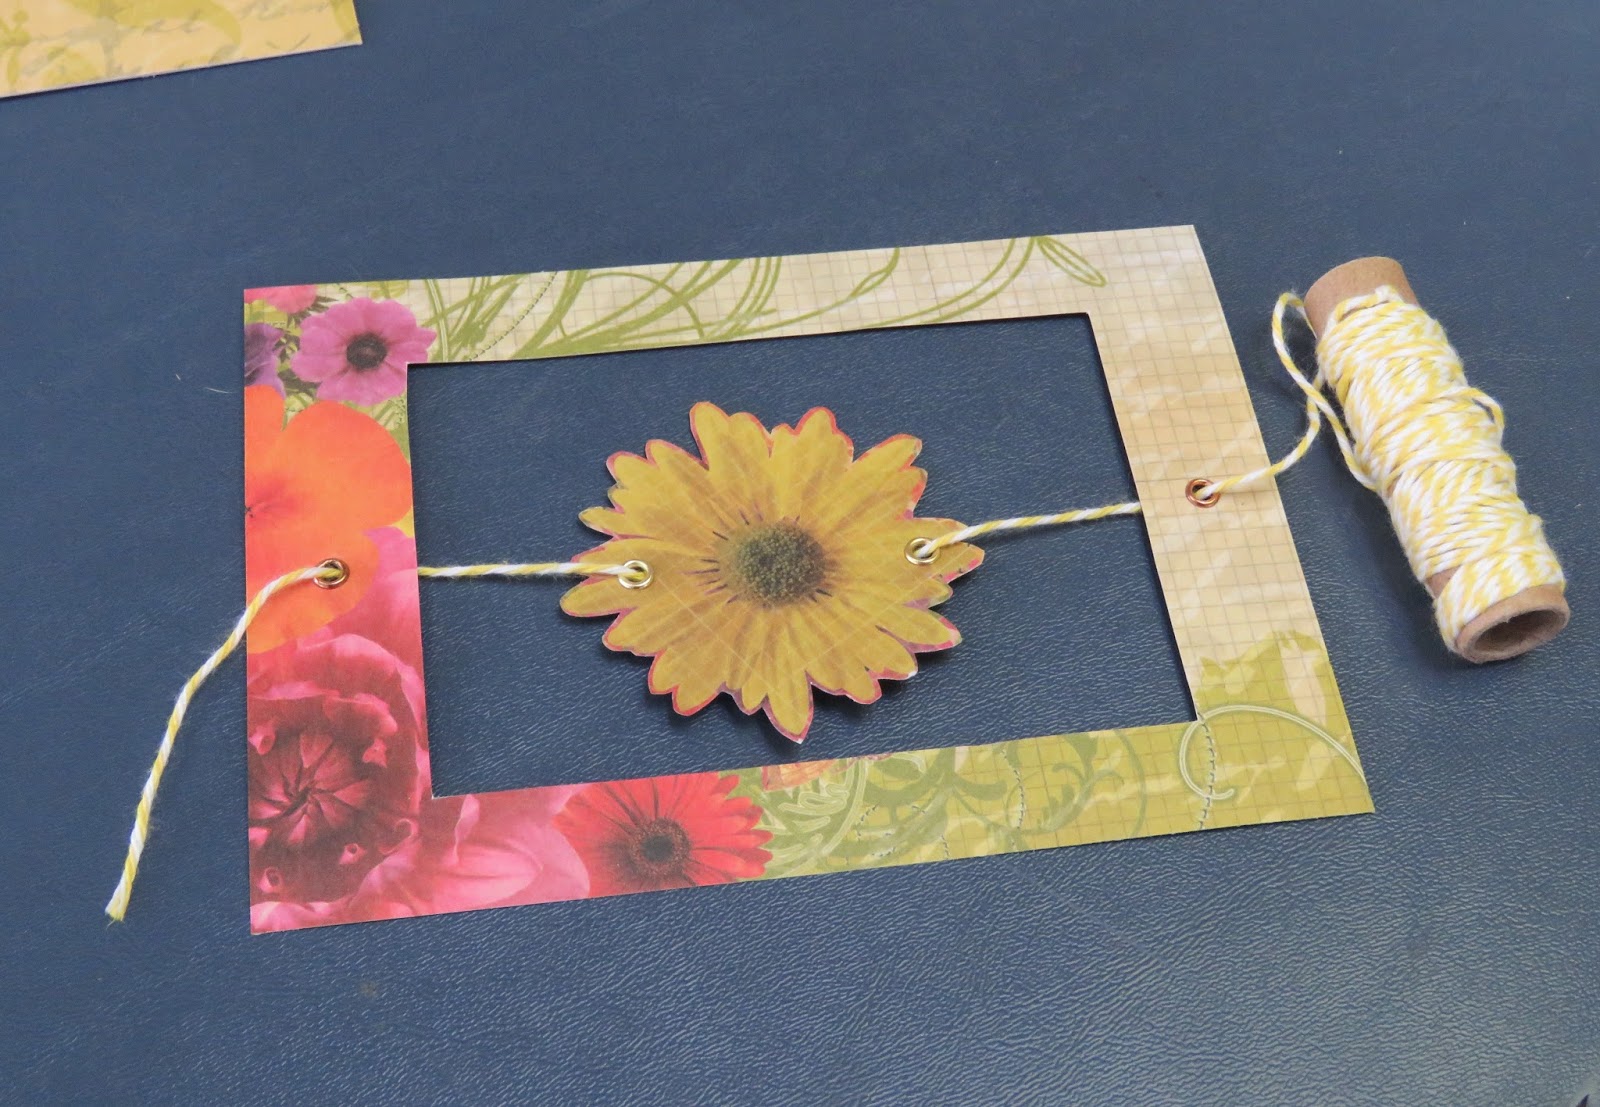
Step 7: Run a fiber (like baker's twine) very specifically - down through the frame and down through image. This will allow for easy movement and for the twine to be mostly behind the image.

Step 8: Pull the image all the way to the right and tie off that end of the fiber with a bead. This will keep it from sleeping through the eyelet when you pull.

Step 9: Then pull the image all the way to the left and tie off the end with a bead.

Now the image will travel back and forth smoothly across the card.

Step 10: Mat a long, thin phrase on a coordinating color and add it to the bottom of the card.
This card is now available for purchase in my Etsy shop! Click here to check it out.
This card is now available for purchase in my Etsy shop! Click here to check it out.


Comments
Post a Comment