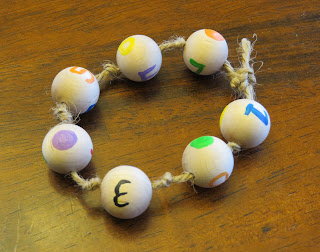
DIY Wooden Bead Ring Toy
A couple of years ago we were given several large tins full of wooden bits. There were cut-out shapes, partially completed scenes and lots of balls, plugs, circles and other parts that could possibly be turned into ... something. That's when I got the idea for putting together a child's toy with painted numbers, letters and colors. This week I put that idea to work.
All you really need are wooden beads, twine and non-toxic, child-friendly paint. You can buy wood beads with holes already through them, or you can just ask your wonderful husband to do it for you, which seems way more fun to me.
Then do a little planning. I didn't want any of the same colors on each bead or the one next to it, so I mapped out what would go where. Each bead has a number, a letter and a dot of color.
Then comes the fun part! I've never thought of myself as a painter because my hands are a little shaky, but this was so much fun. And I actually followed my own instructions.
You can put whatever you'd like on your beads, so use your creativity. Let them dry overnight before stringing them up.
I used twine for mine to stay with the rustic feel, but a mom friend of mine suggested a crocheted cord. That way it won't frazzle when it gets wet from being chewed on.
Because we learned from experience that this is exactly what would happen! It was a huge hit with the young crowd, and I'm excited to play around with these new suggestions. If you make a set, I'd love to see your pictures.


Comments
Post a Comment