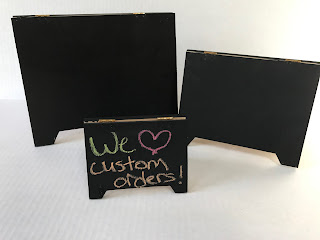
Chalkboard Sandwich Board Signs
We're always trying to change things up in our displays when we go to art shows. Some of the display pieces get boring, while others are just out of date. The goal is to look more professional and more customer-friendly than the show before. With that in mind, last week we put together some adorable chalkboard signs to replace the folded pieces of paper we had been using.
To get started, I used a ruler to draw a rectangle with a notch removed for its little legs.
On the copier, I reduced the drawing to 75% and 50% so we would have three sizes of signs. Those copies were then turned into cardboard templates that we can keep and reuse.
From there we traced them onto wood and cut them out with the band saw and scroll saw. A note here: we used two hinges to hold the signs together. In hindsight, we should have chosen our wood based on the length of the screws. They were longer than the thickness of our wood, so we had to add a couple of steps to this process. More on that in a minute.
After they were sanded, we sprayed them all with two coats of chalkboard paint. Read the directions on the paint carefully so you get the best results.
Then our two hinges. When they poked through the wood on the front side, Danny used the Dremel tool to grind the points down flat. Then all it took was a little touch-up paint on the wood and a black Sharpie on the screw head.
Then we attached a piece of twine with staples to keep it from falling flat.
I adore how these signs turned out, and they were incredibly easy to read at the show last weekend. I can't wait until they're all done and scattered around our display table.


Comments
Post a Comment