Sunday Sketch
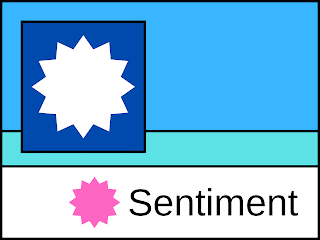
In honor of all those kids who have to go back to school in August, I pulled out one of my favorite School Days cards. I'm a huge fan of layers - it just makes the card look more intentional and finished - and this is a great example.
I make my cards by starting with an 8.5x11-inch piece of card stock and trimming it down to 6.25x9 inches. After folding it in half, I covered it with a sheet of decorator paper so that one of the pre-printed phrases was in the bottom corner as my sentiment.
Then I cut two more pieces of card stock to the right width and tore them across the long edge. This created three distinct layers of pattern from top to bottom.
My large embellishment is a coordinating 3D die cut matted on a piece of decorator paper, matted on the same grey paper that I used for the background. The small embellishment next to the wording is pre-printed as well.
Ready to make this card your own? Start with a plain piece of card stock, folded to fit your envelope, and cover it with decorator paper. Then, before you do anything else, attach your sentiment to that bottom corner. The height of your sentiment will determine the rest of your layout, so do this now.
With your sentiment in place, tear a coordinating piece of decorator paper or card stock on the long side and attach it just above the wording. Trim it as necessary along the other three edges. Repeat with a second patterned paper so you have three layers altogether.
Have fun with embellishments, choosing a small one to go with the sentiment and a large one for your focal point. Mat the larger one on decorator paper, then card stock for some added layers and dimension. Finish it off with any other accents that compliment your design.
For more card layouts and design ideas, visit Stuff From Trees on Facebook.


Comments
Post a Comment