Sunday Sketch
I'm telling you, layers are the best way to take your paper crafts from so-so to sensational. I actually have one of the first cards I ever made, and I regret to inform you that it's a single black-stamped image on a piece of white card stock. Oh, how far we've come!
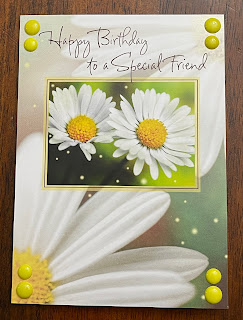
Today's birthday card has two daisy images - one for the background and one for the matted image in the middle. I wanted to make the tiny daisies stand out from the background, so all I did was mat them on yellow card stock.
For embellishments, I added eight acrylic dots in the corners for some added dimension. If I'd been thinking about it, and not rushing on to do the fun stuff like words and dots, I would have raised the matted image on 3D adhesive to create a shadow layer. More layers!
Ready to make this card sketch your own? Start with a folded piece of white card stock, then choose your background layer. You can start with a solid color and then cut a pattern 1/2-inch smaller to create a border, or you can adhere the pattern directly to the card stock.
Pick a smaller, coordinating image for your focal point and mat it on a coordinating color of card stock. Either adhere it directly to the patterned paper or mount it with 3D adhesive for some extra dimension.
Create a sentiment that will fit in the space above the focal point and attach it. Then embellish it with two tiny accents in each corner, and you'll have a beautiful layered card.
For this and many more Christian greeting cards, visit Stuff From Trees on Facebook.


Comments
Post a Comment